A preview of what we've been working on the last few days...
Monday, March 26, 2012
Wednesday, March 21, 2012
Paint Colors
I am so excited because tomorrow painting begins on the house! Which means that all of our chosen paint colors are final (eeek!). Picking out paint colors, especially gray tones and shades, was extremely difficult for me. I am such an indecisive person that I changed my mind about a million times before Vinni told me that I had to make a decision or he was going to just paint the house one single color and be done with it! I think he's more relieved than I am that the house will be painted so that I can't change my mind anymore. Our color scheme for the house will be gray's and white with orange accents.
Living Room, Dining Room, and Kitchen:
Martha Stewart
Bedford Gray
Master and Family Room:
Behr
Creek Bend
Office and Guest Room:
Martha Stewart
Sharkey Gray
Bathrooms:
Martha Stewart
Cement Gray
Monday, March 19, 2012
Like New!
The fireplace is something that definitely needed a little updating. The front frame of the fireplace needed a good cleaning and revamping. In order to modernize the frame, I decided to paint the brass black and wow did it make a world of difference!
The before product...
After some cleaning...
I taped the glass off and sprayed the frame with this high heat spray paint I bought at Home Depot...
and voila! a brand new fireplace frame...
Once we get this baby put back into the freshly painted fireplace I will take some 'after' photos to show the improvement.
Update Continued...
After we were able to get all of the kitchen cabinets out and all of the demo finished, the next step was to knock down a few walls and take out the unneeded soffits above the cabinets. We really wanted to make the living and kitchen space an open flowing area with little division between the rooms. Therefore, we decided to make a half wall where the oven is and have a floating range and peninsula where people can sit. We knocked the wall out and also took down the soffit above it so that we were able to have the electrician cut holes and wire the ceiling for pendant lights to hang above the counter.
This picture shows the wall from the other side looking in from the dining room. They took the drywall off so that the electrician could move wires and such before they took down the beams and opened it up.
I can't seem to find all of the other pictures I took from the day above, but here is the finished drywall product (looking into the dining and living room space). A little to the left of where Vinni is standing is where the oven will sit against the wall. Above him you can see the holes where the pendant lights will hang.
The second wall that we changed is the one that separates the kitchen and family (fireplace) room. Originally, there was a half wall that had the wooden posts that you could see through. We thought the opening would be more functional if we widened it and framed the half wall to be a full wall. Cutting the half wall back made a huge difference in the flow of the house and also created more space so that we are able to put in a larger kitchen island with a little bit of an overhang countertop.
Luckily, we had lots of helpers on this day! :)
Here's a better view after the drywall and canned lighting...
Which is a huge improvement from what it used to look like...
and the best view of all (ignore the big hole in the ceiling)...
More pictures...
Yesterday the texturing began and we were actually able to finish thanks to the help of Vinni's parents. Steve (Vinni's Dad), is an amazing drywall expert and worked extra hours just to finish. While the boys textured the house, Tina (Vinni's Mom) and I masked all of the windows, doors, electrical outlets and heating vents.
Here's some pictures of Steve spraying all of the texture...
With the new texture on the walls, the house seriously looks brand new! It's hard to tell in the pictures but it really makes a huge difference. Oh, and the best thing is that the old people smoker smell is all gone now! :)
Finally An Update!
Hi all,
So this past month has been extremely busy! Vinni closed on the house February 27th which was a Monday and on Tuesday we started tearing the place apart (literally). I wasn't able to be at the closing since I had to work, but Sam sent me a picture of Vinni signing the paperwork...he is officially a homeowner!
Once he signed the papers we were so excited to start working on the house. The first week we (Vinni and I) tore out all the carpet, carpet padding, linoleum flooring, base boards, casing on the doors, kitchen cabinets, appliances and wood paneling--it was extreme and we were both exhausted!
Day 1
We started with the baseboards. We cut all the caulking on the top of them so that we were able to easily stick a crowbar into the top and loosen them from the wall. This sounded fairly easy until we realized that the carpet needed to come up before the trim came off because the previous homeowners laid the carpet after all the trim was installed.
We started in the living room and then continued throughout all the bedrooms.
There was a lot of trim to take off!
I couldn't believe the amount of dirt under all of the carpet. The family room was the worst especially because it had the original 1970's carpet and padding underneath.
For our first day of demo, we got a lot done!
Day 2
The next day (or night I should say, considering we were doing all of this work after our day jobs) I was itching to take the paneling off of the fireplace wall. This was something that had to be done before it got too dark outside because we had no overhead lighting in this room.
Here's the fireplace without the paneling...doesn't it already look better?!
Next we pried the casing off of all interior doors including closets.
After the casing was finished, we started in the kitchen...
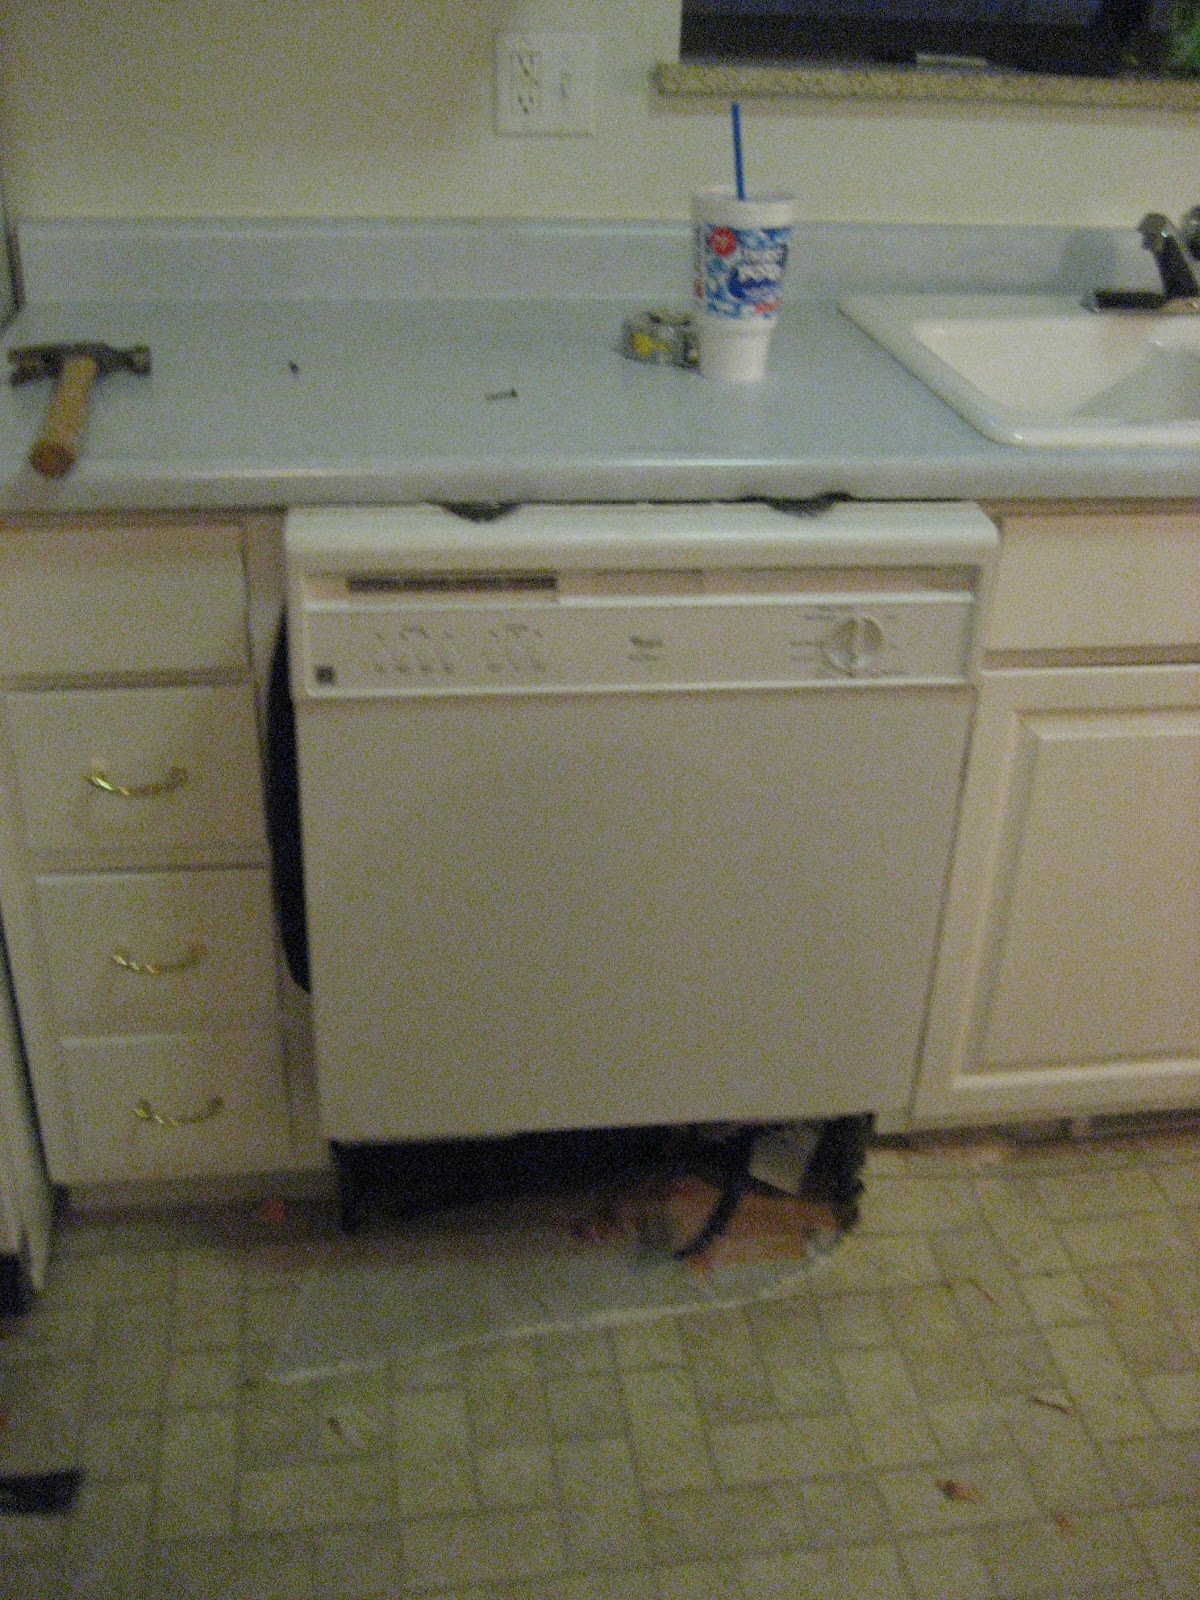
We found that we couldn't pull out the dishwasher until the linoleum flooring was pulled up.
The first cabinet to come down!
Surprise! We found a vintage (and unfortunately ugly) 1970's floor!
The worst part of this kitchen was tearing up the linoleum flooring. The previous homeowners decided that instead of tearing up the 1970's flooring, they would just lay some plywood on top of it and lay the new floor over the plywood(!). Yikes! This created a ton of work and multiple headaches. When we pulled the wood up, the nails popped through the bottom, so after we got the wood off we spent another hour+ pulling out a thousand nails!
It was a process...
Since the 1970's flooring is plastered to the subfloor and not raised enough to create an elevation change, we figured it will be fine to lay the hardwood directly over it---that way in 40 years a new couple can tear the floor out and find this fun little "surprise".
More to come in the next post...
T.
Subscribe to:
Posts (Atom)